Home |
PoolShot |
Pool Instruction on the Web |
|
Make your own billiard practice Drills ! |
|
1a - Speed Control - Level 1 

|
|
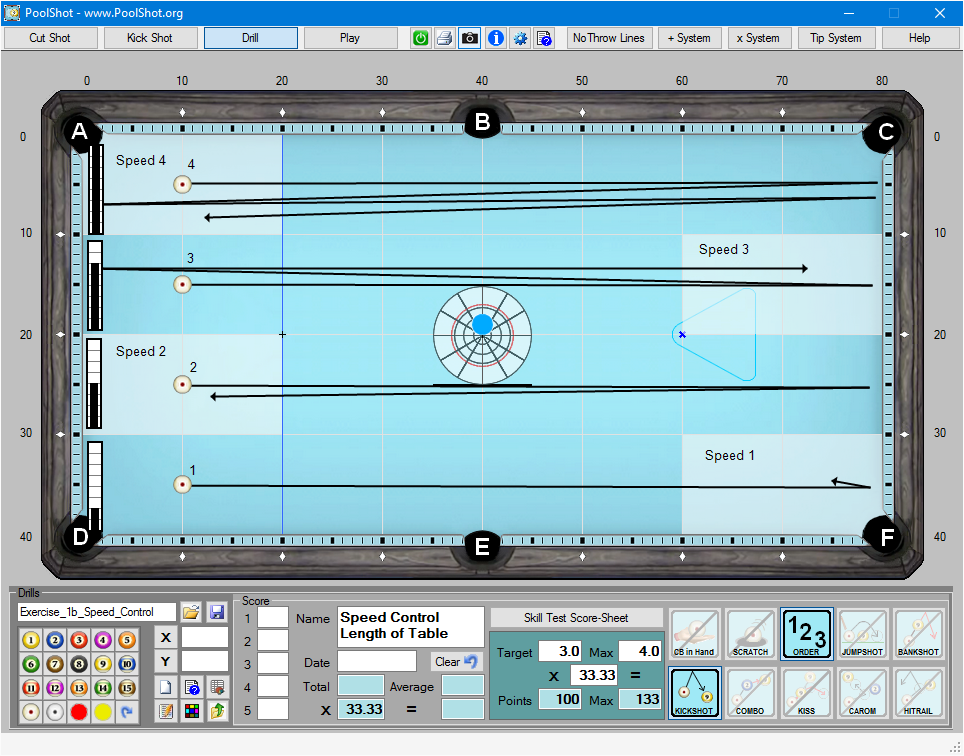
1b - Speed Control - Level 2
|
|
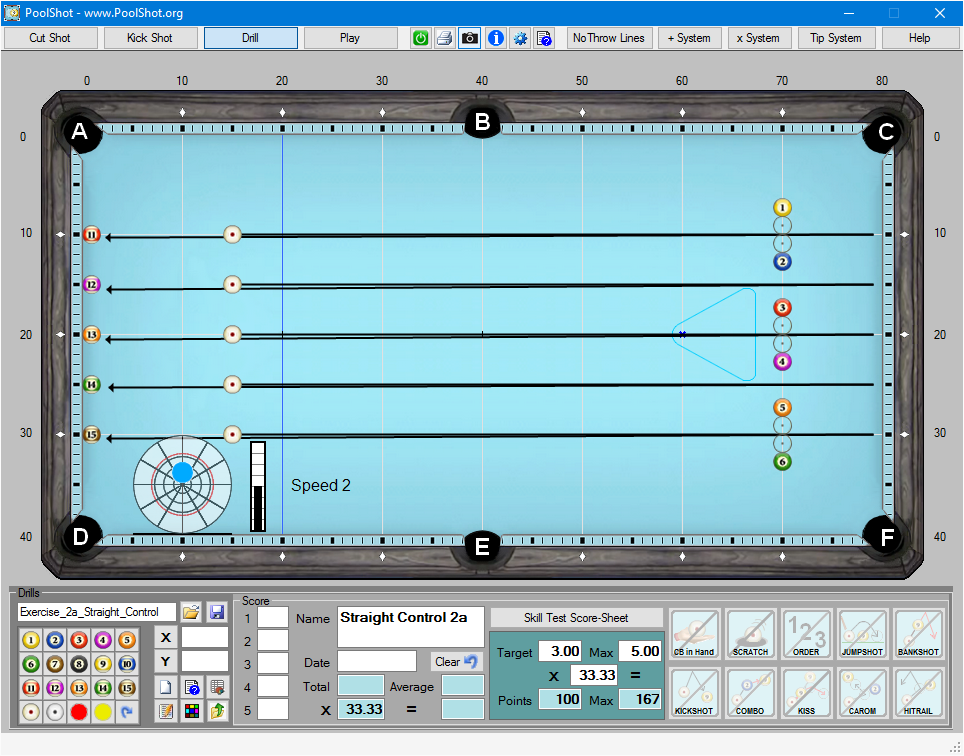
2a - Straightness and Speed Control
|
|
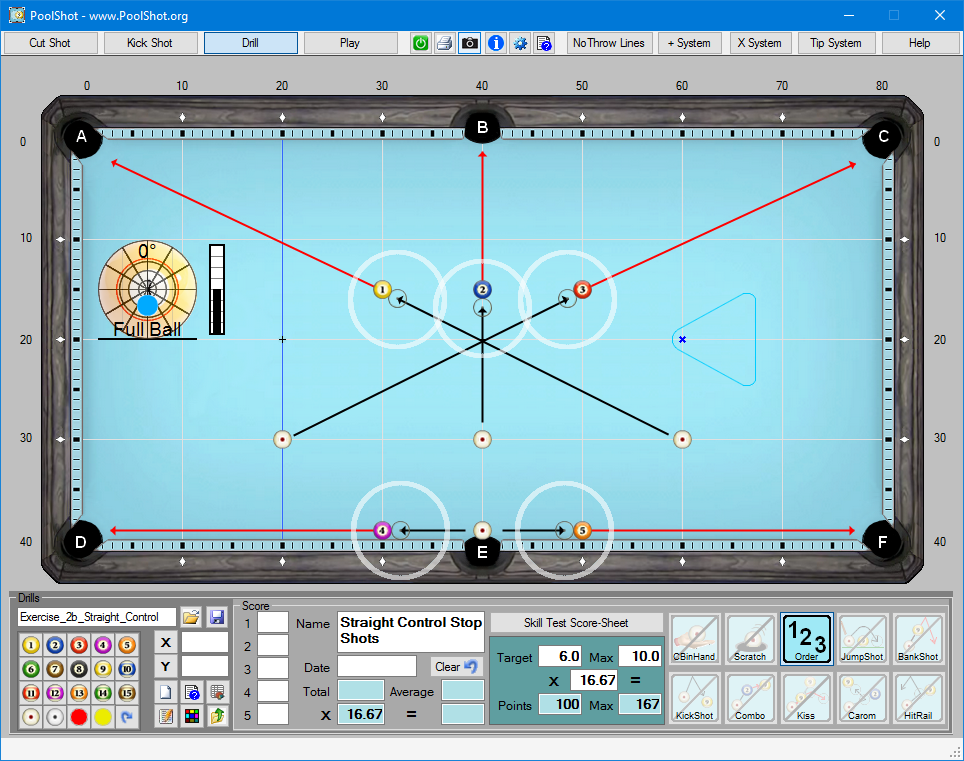
2b - Straight Control and Stop SHots
|
|
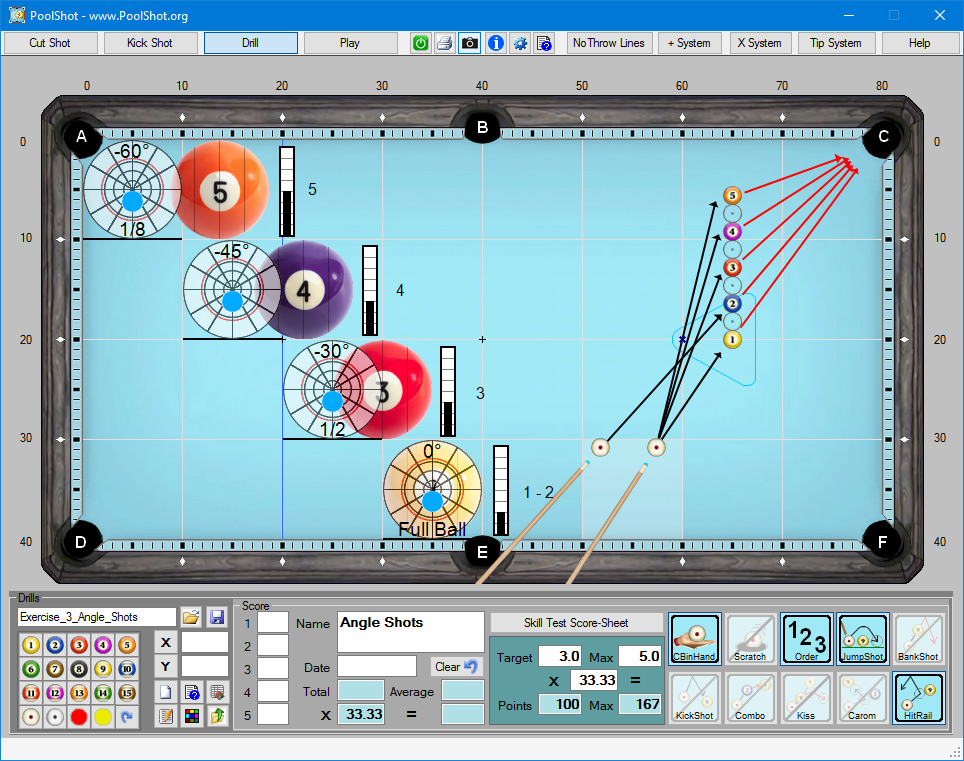
3 - Angle Shots
|
|
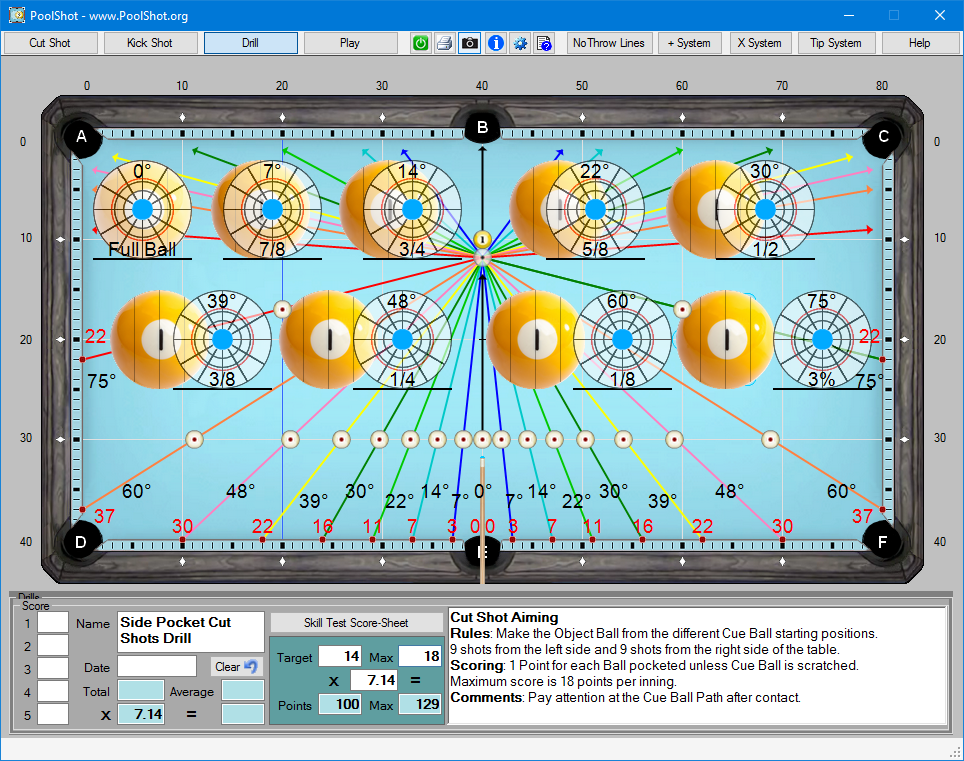
3b - Side Pocket Cut Shots Drill

|
|
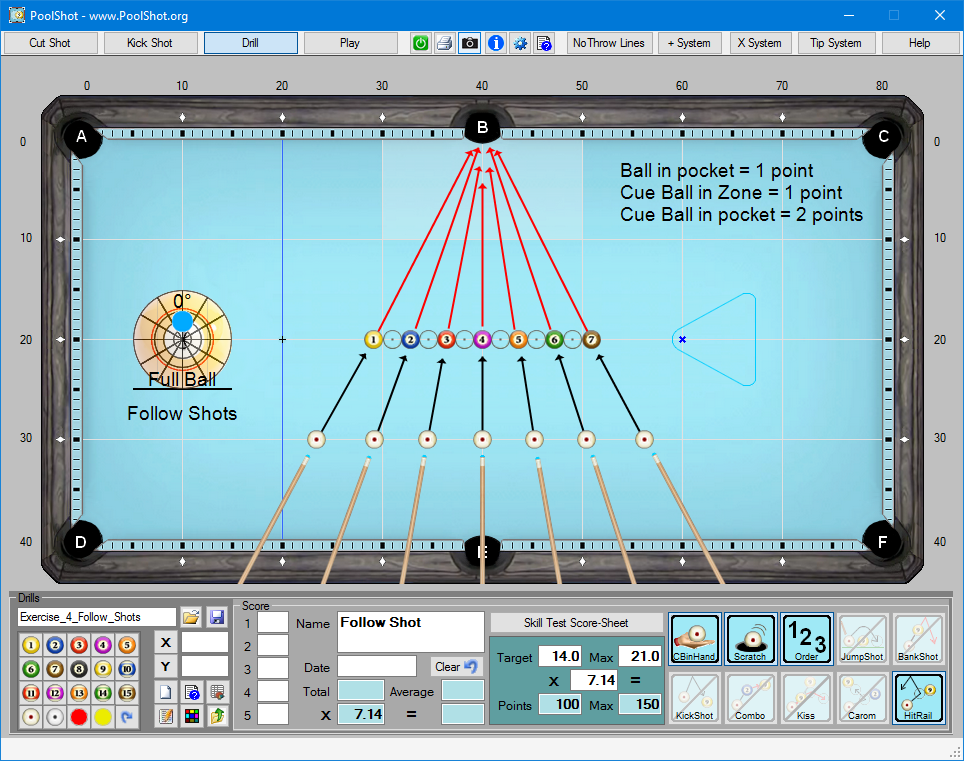
4 - Follow Shots
|
|
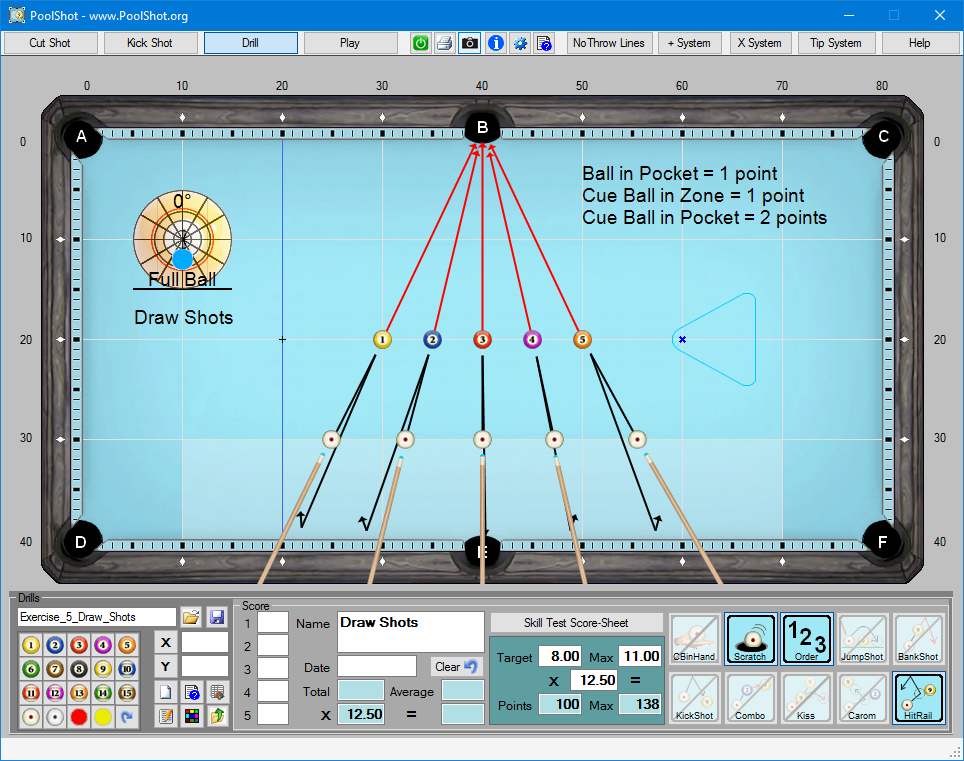
5 - Draw Shots
|
|
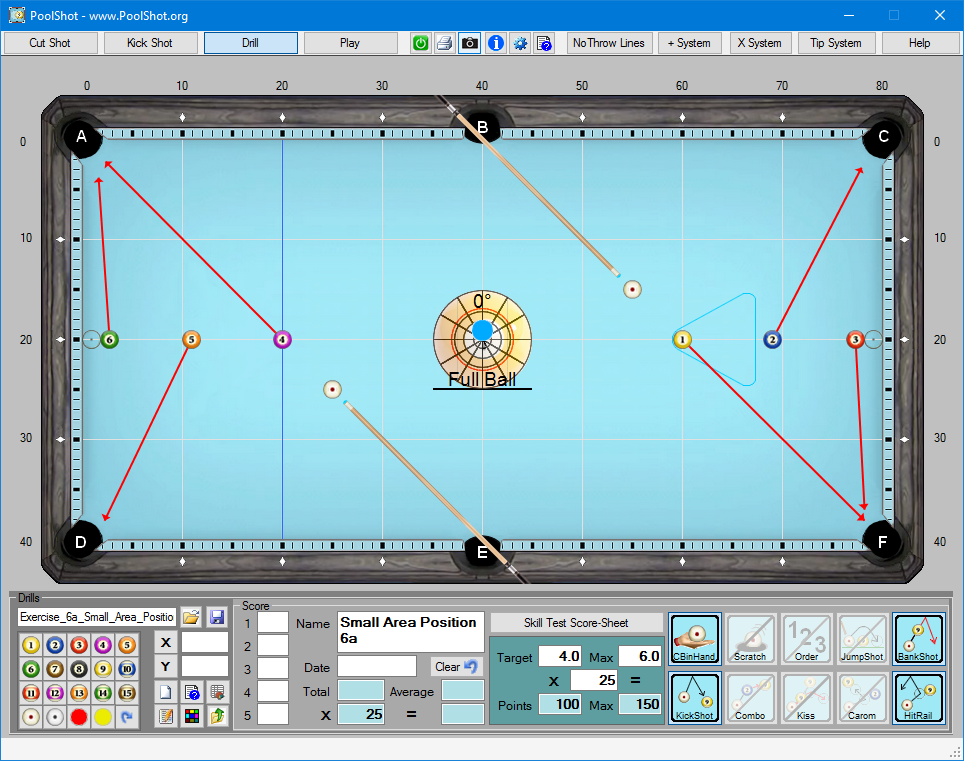
6a - Small Area Position Drill
|
|
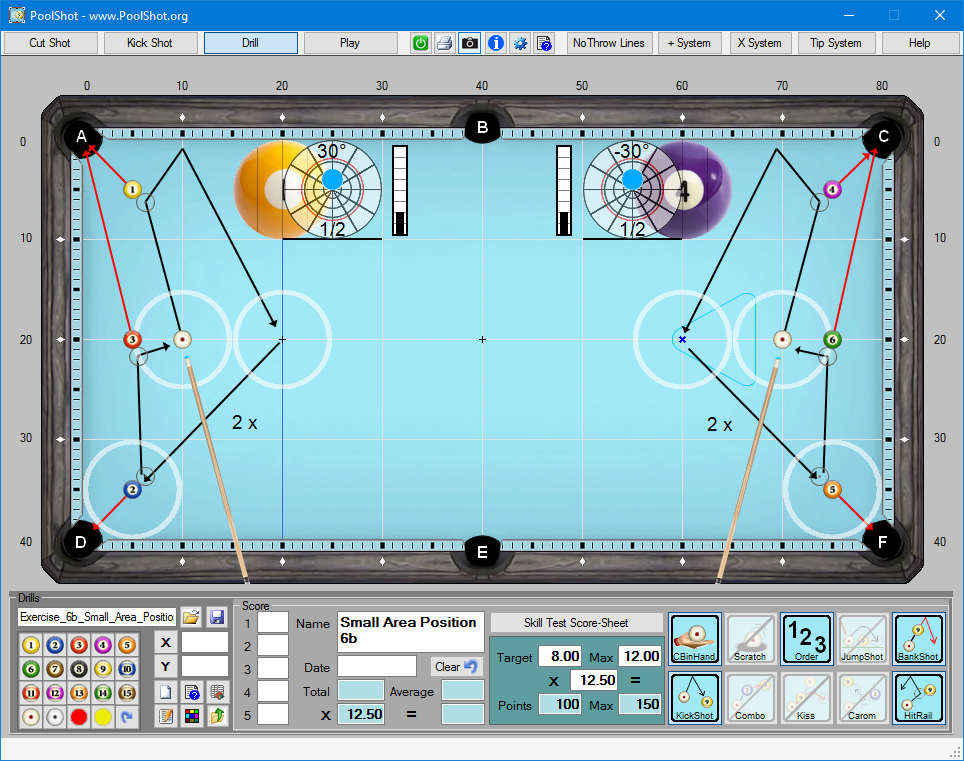
6b - Small Area Position 6 Balls Drill
|
|
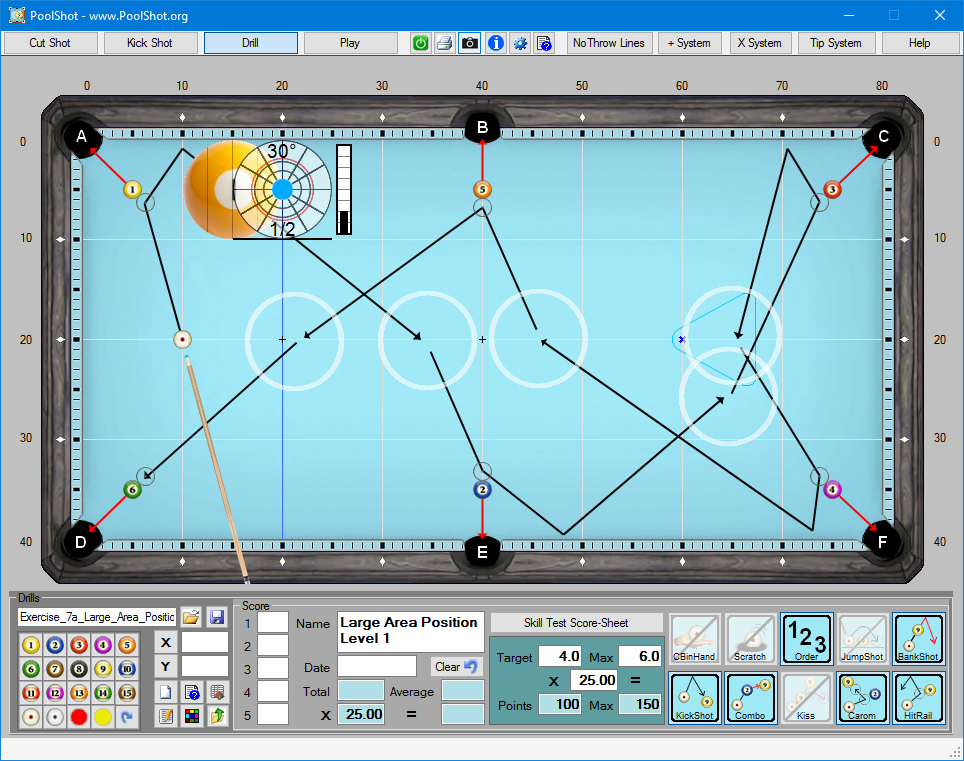
7a - Large Area Position Drill
|
|
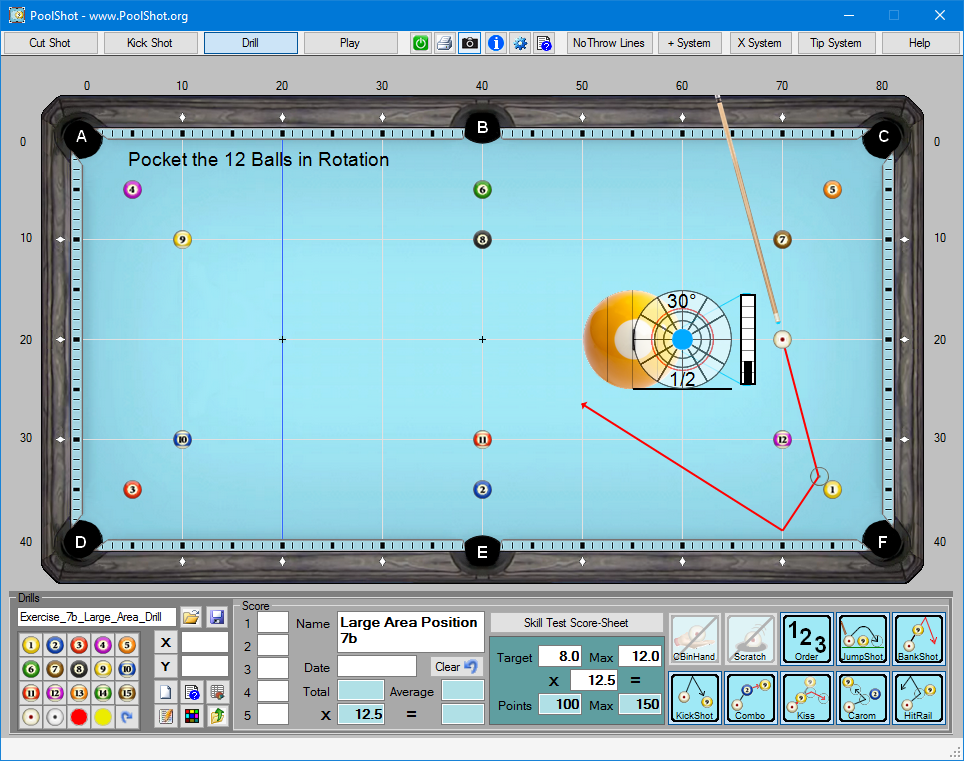
7b - Large Area Position 12 Balls Drill
|
|
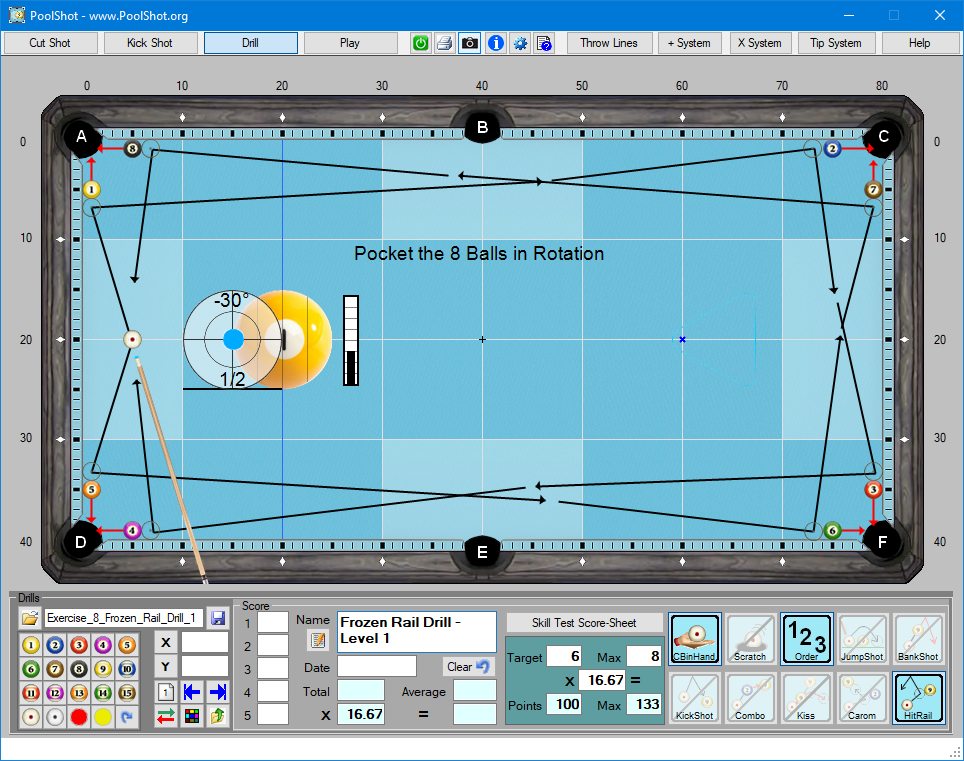
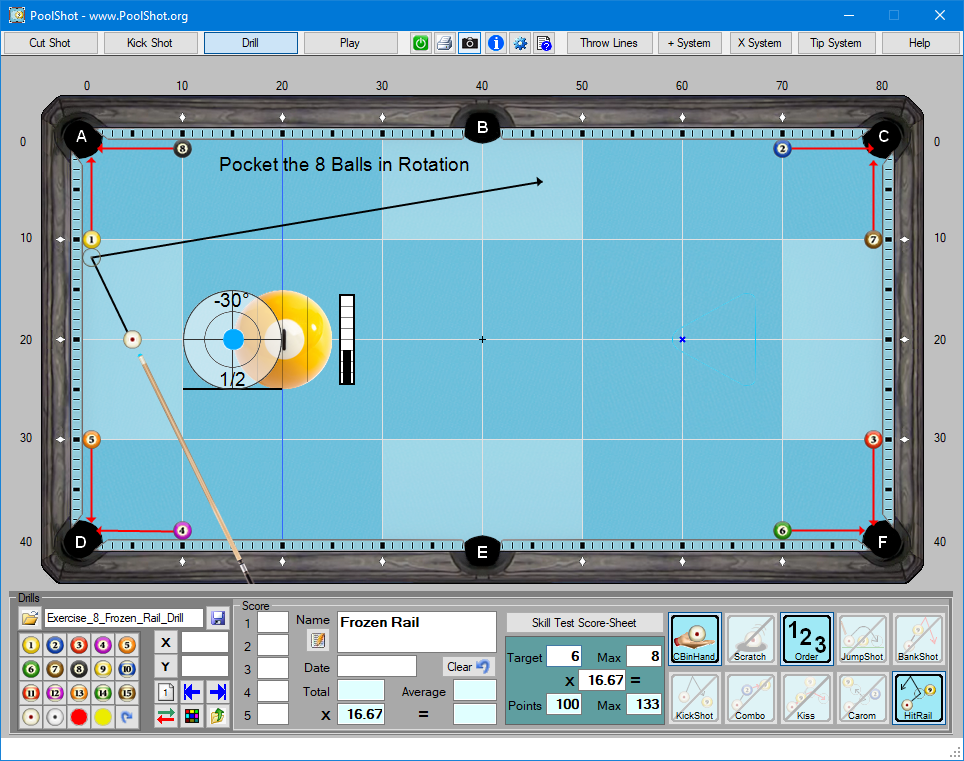
8a - Frozen Rail Drill - Level 1
|
|
8b - Frozen Rail Drill - Level 2
|
|
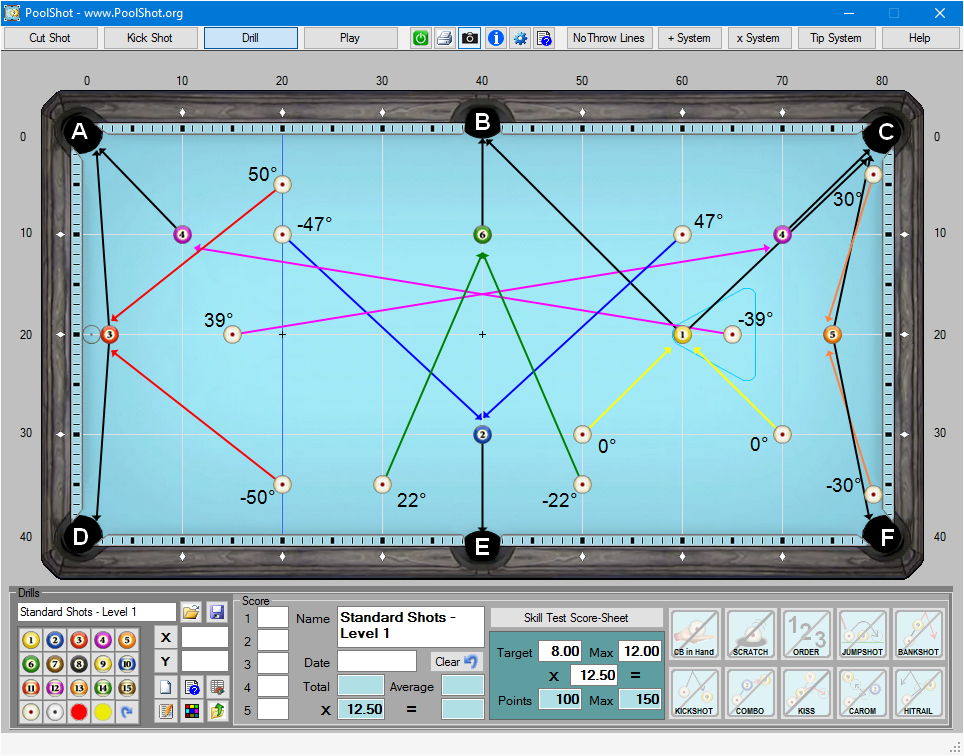
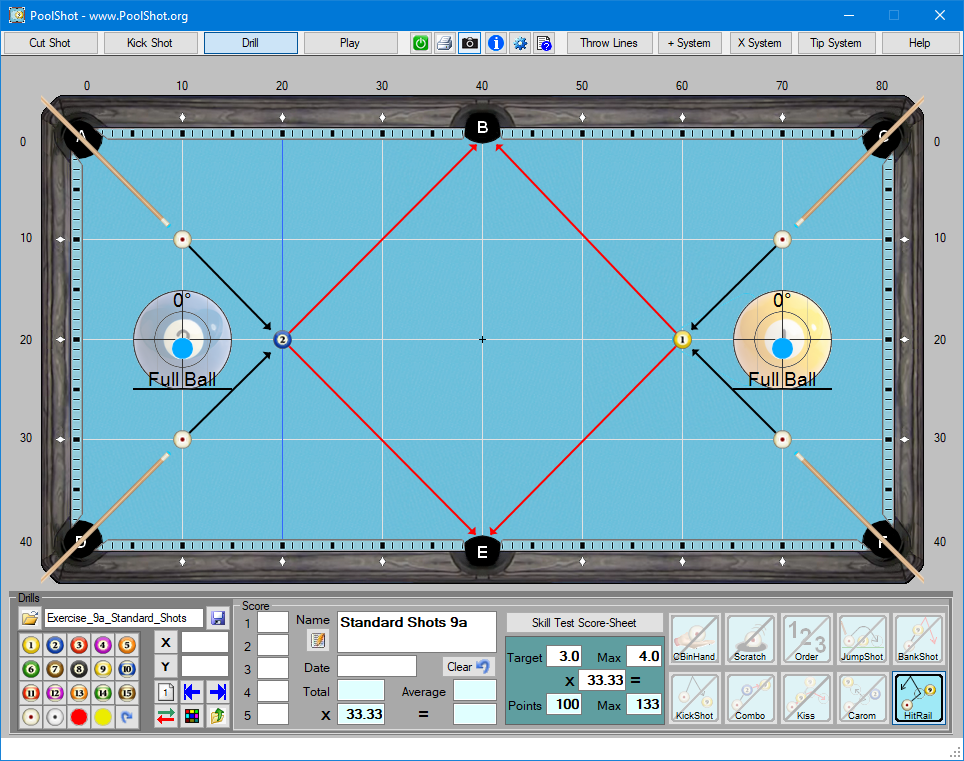
9 - Standard Shots - Level 1
|
|
9a - Standard Shots with Cut-Angle 0°
|
|
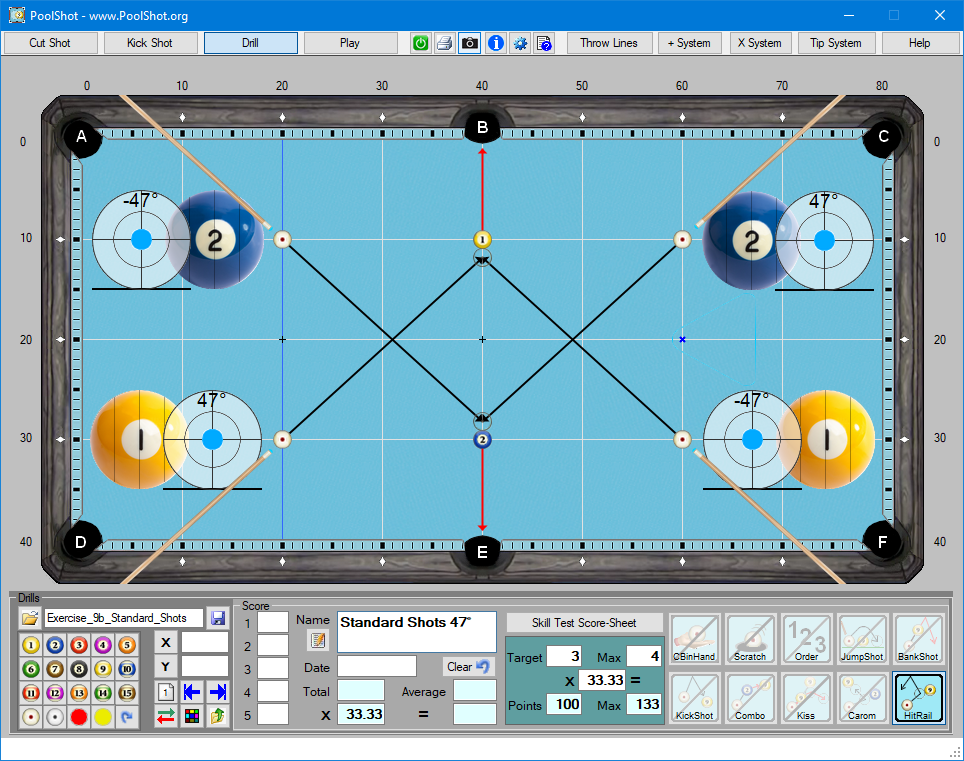
9b - Standard Shots with Cut-Angle 47°
|
|
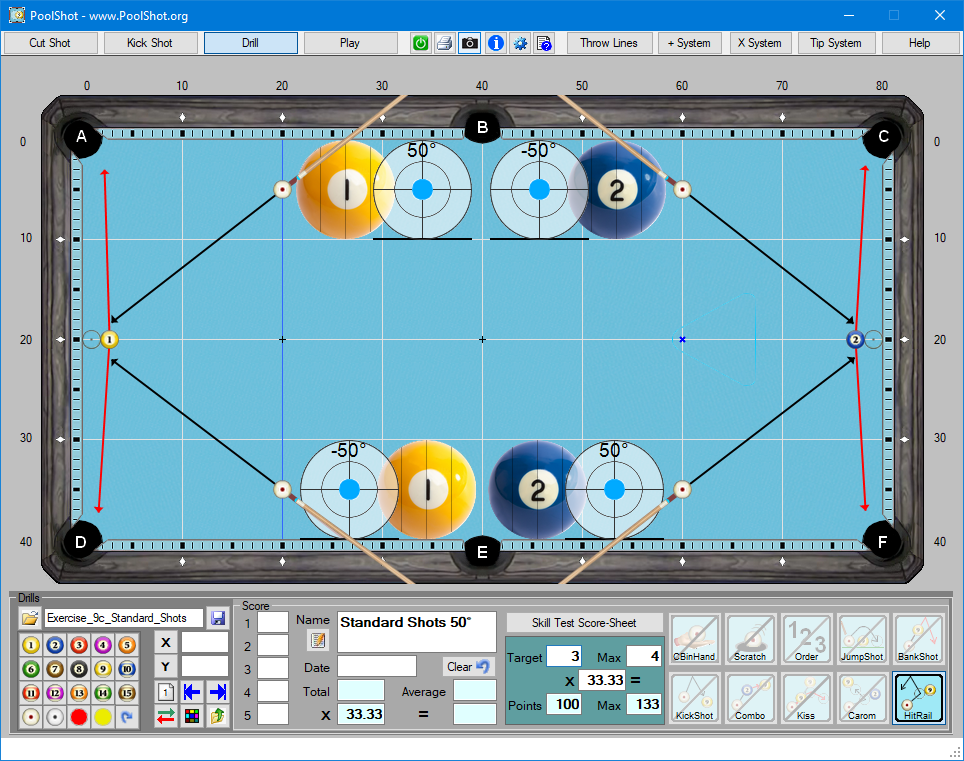
9c - Standard Shots with Cut-Angle 50°
|
|
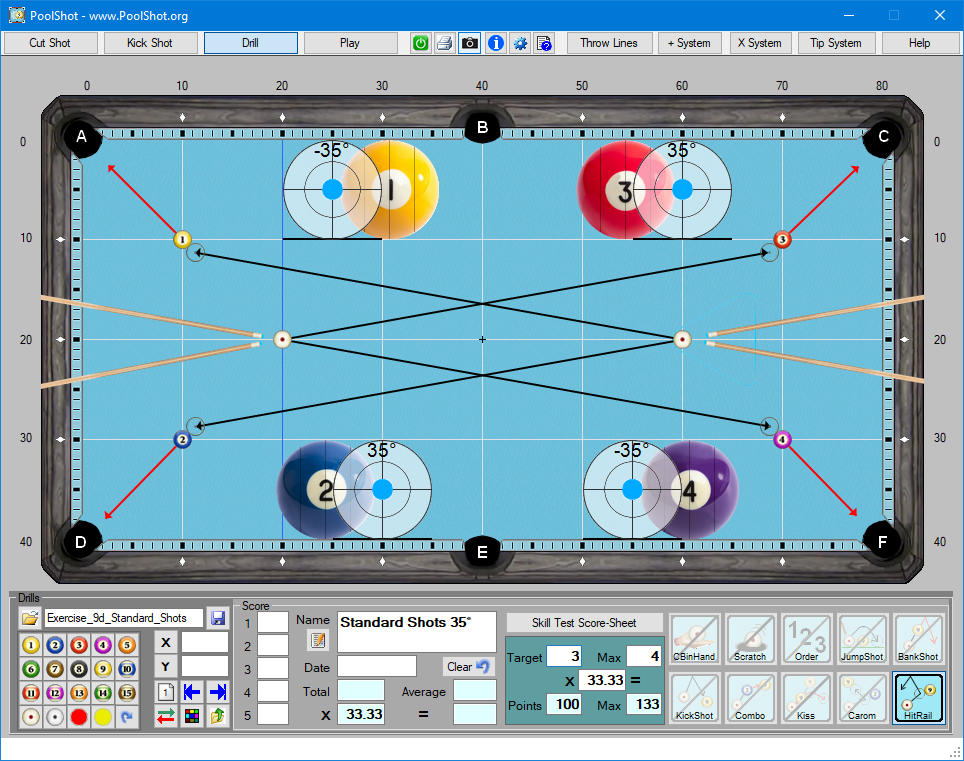
9d - Standard Shots with Cut-Angle 35°
|
|
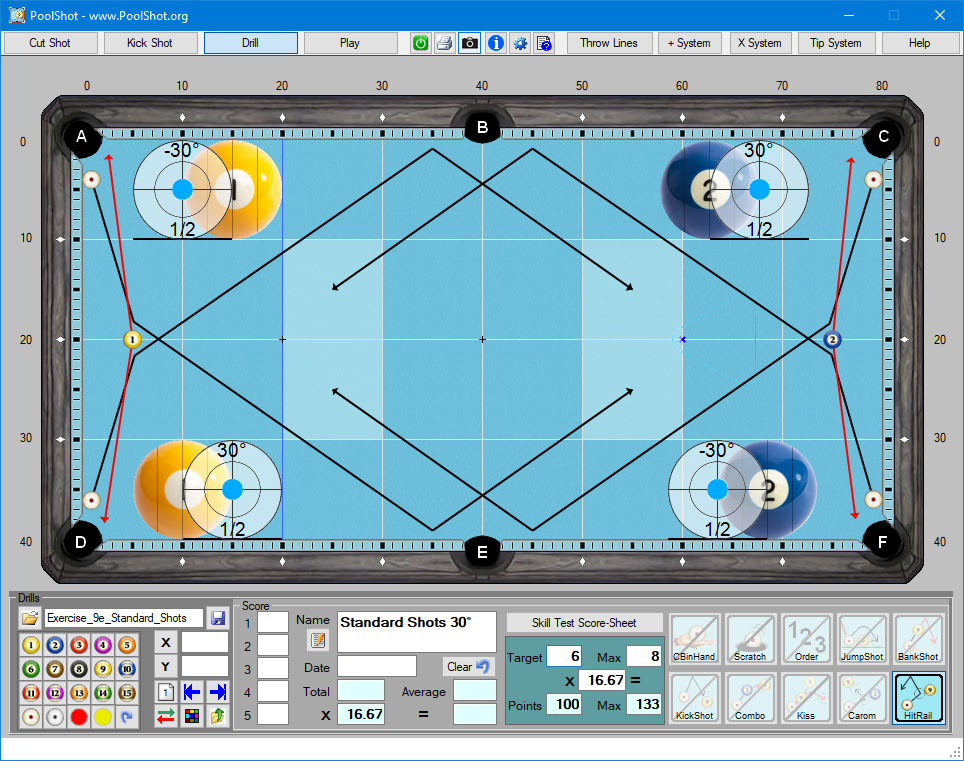
9e - Standard Shots with Cut-Angle 30°
|
|
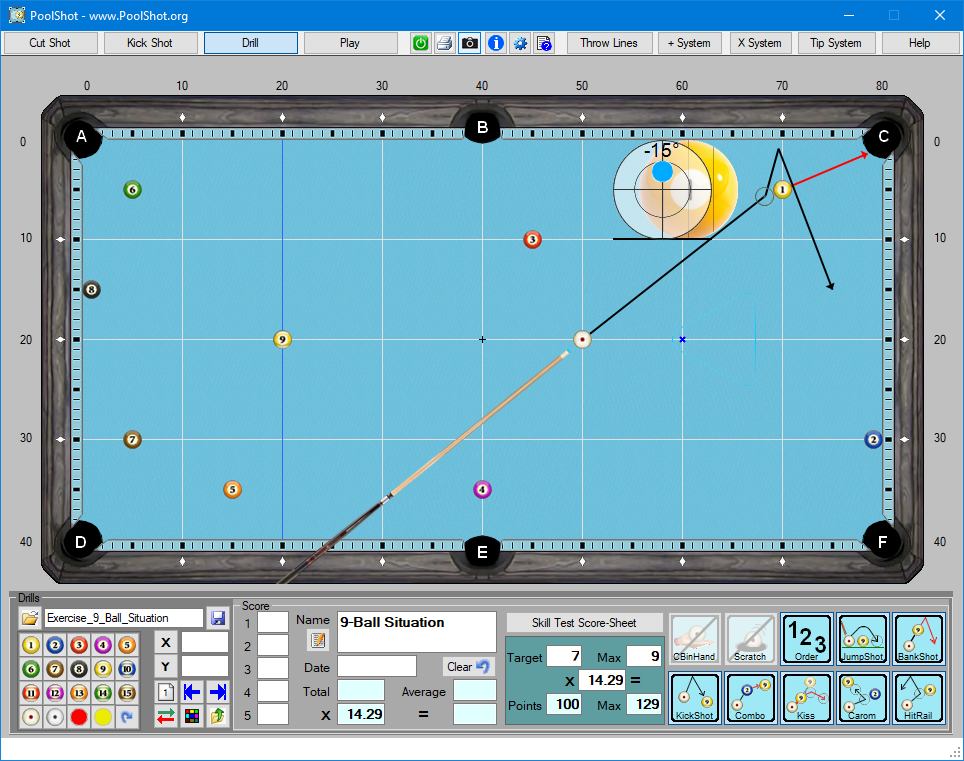
10 - 9-Ball Situation
|
|
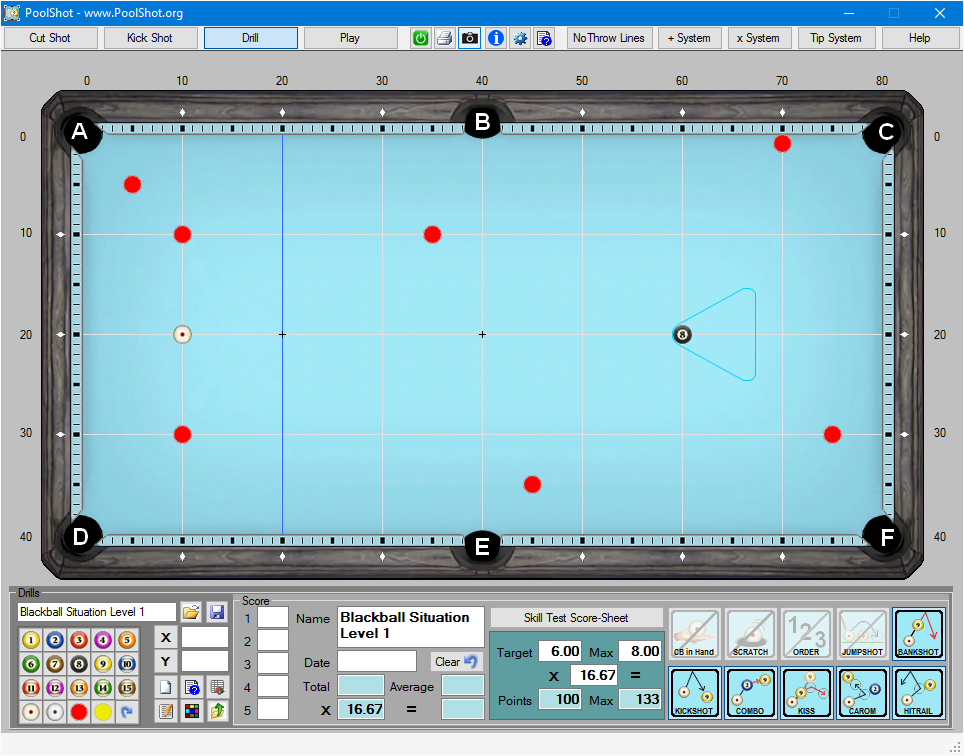
11 - Blackball Situation Level 1
|
|
20 - Hide Cue Ball 1 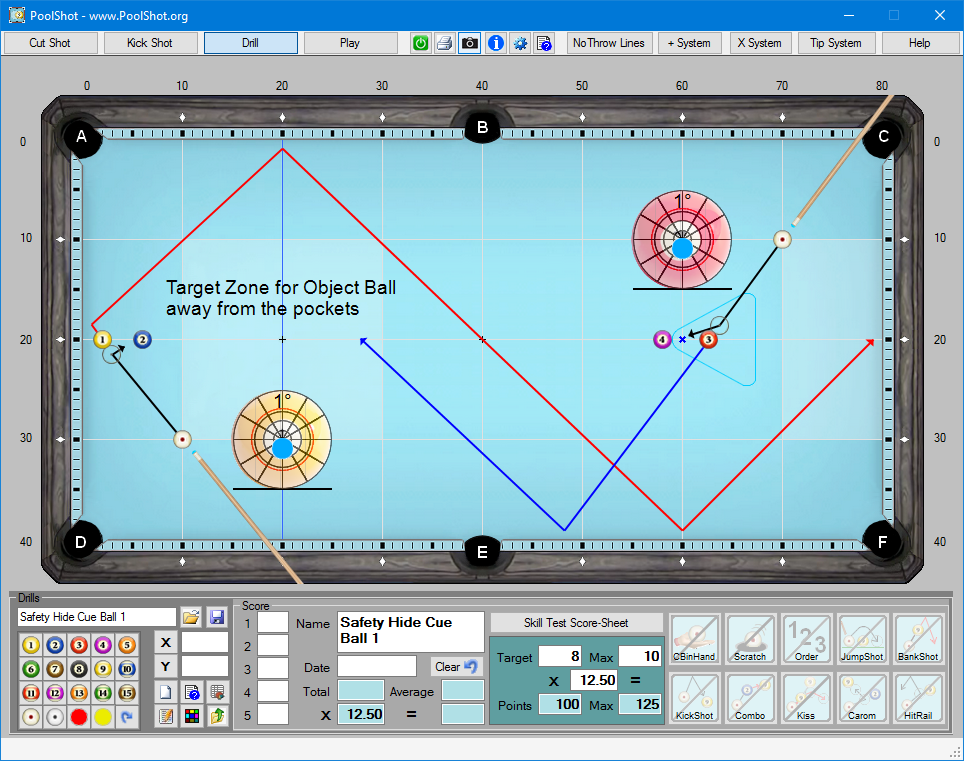
|
|
21 - Hide Cue Ball 2 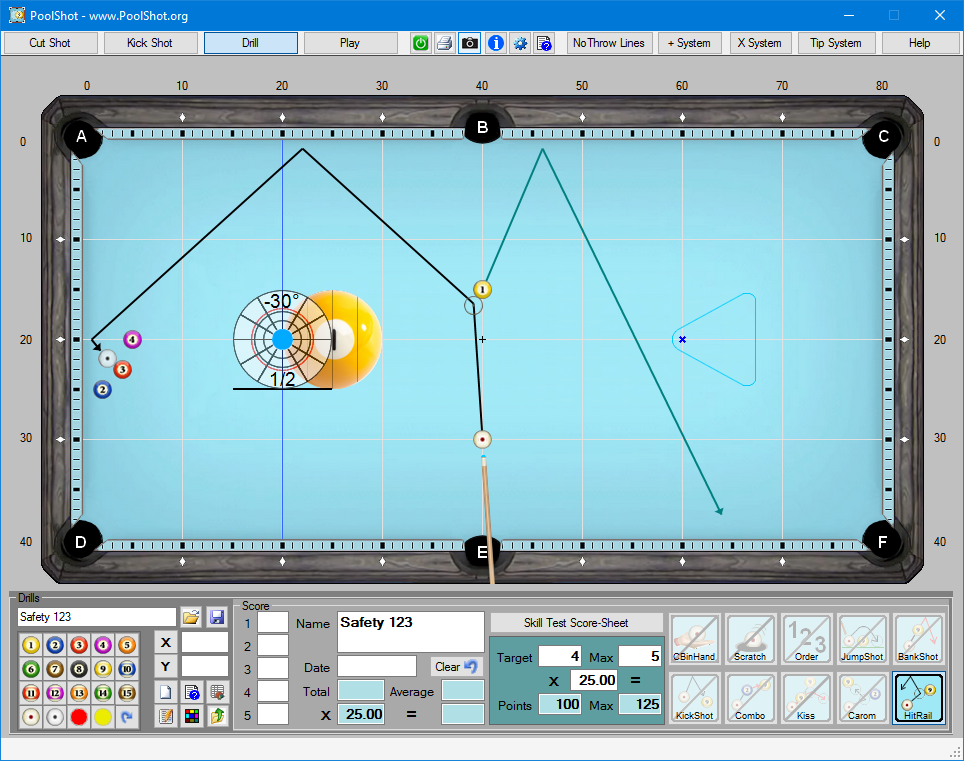
|
|
22 - Safety 1 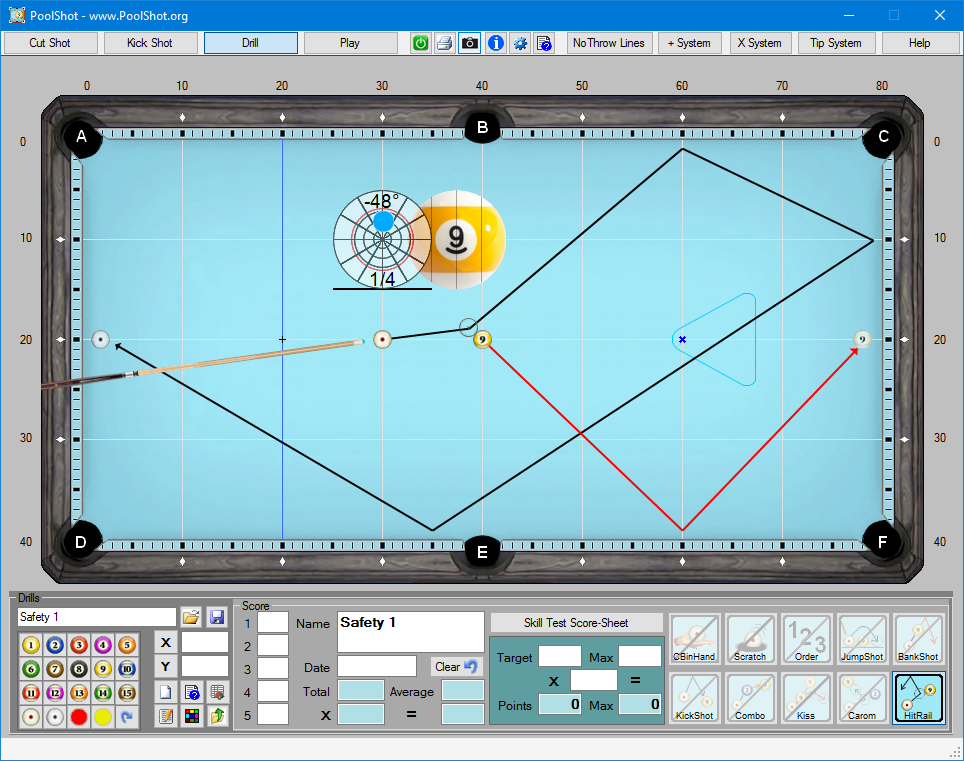
|
|
23 - Combo Shots only ! 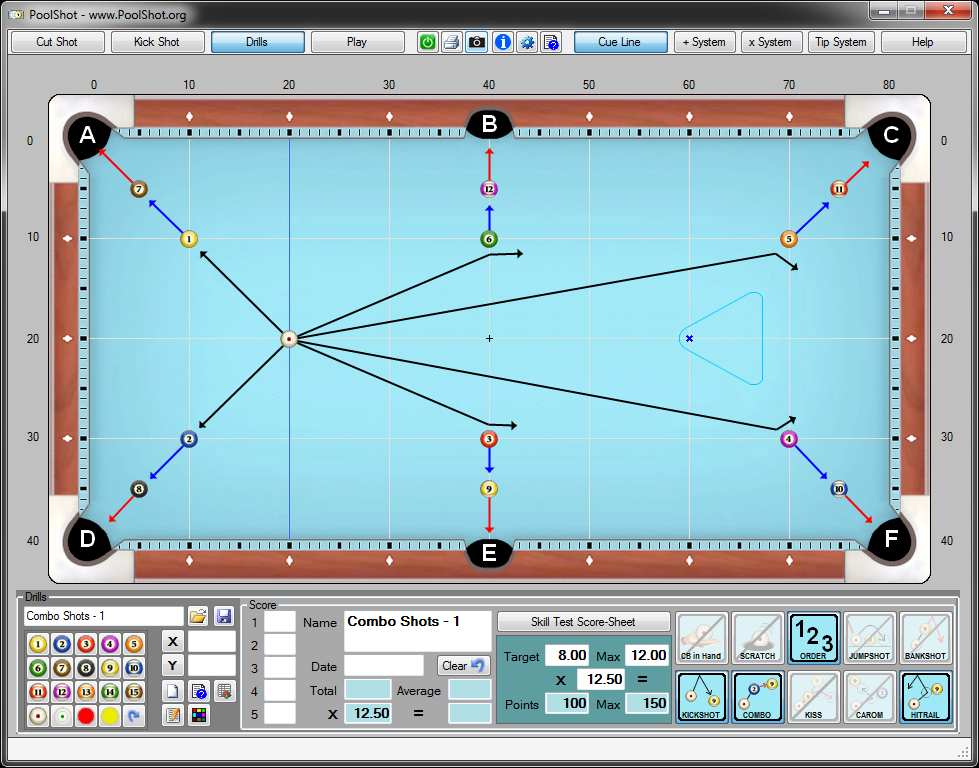
|
|
24 - Stop Shots only ! 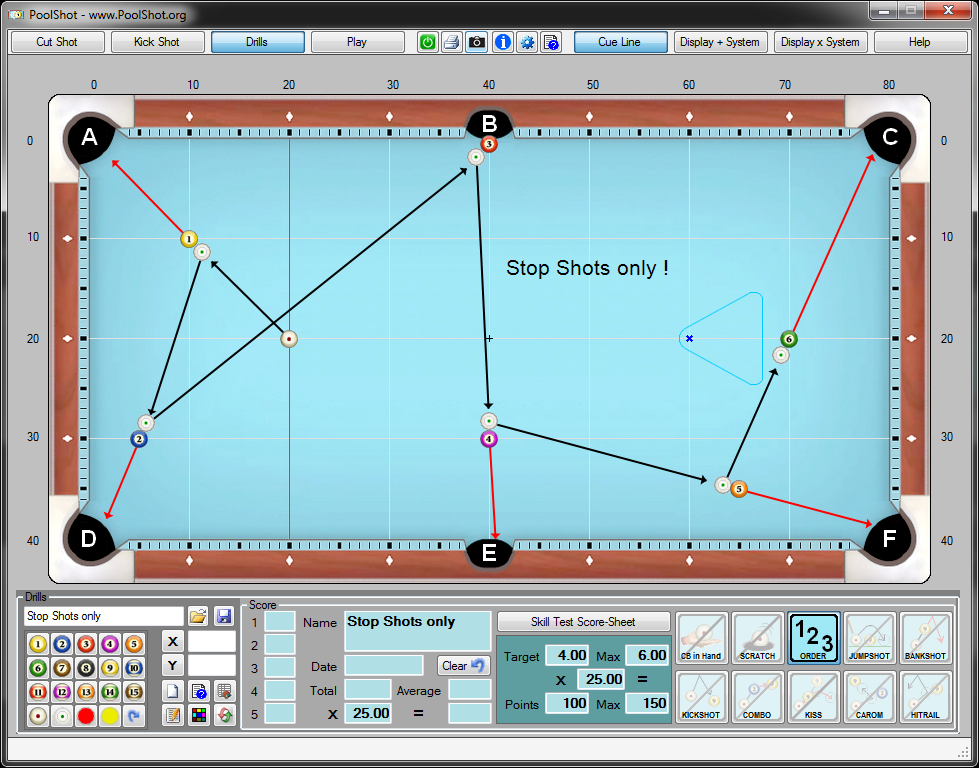
|
|
25 - Jump Shots Straightness Drill 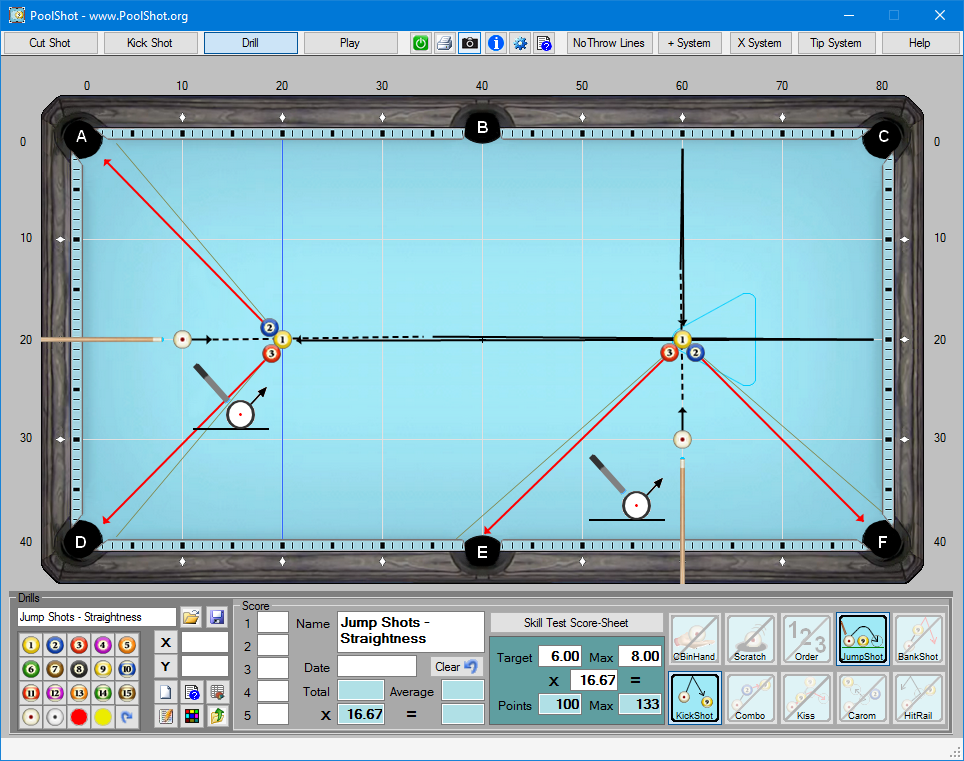
|
|
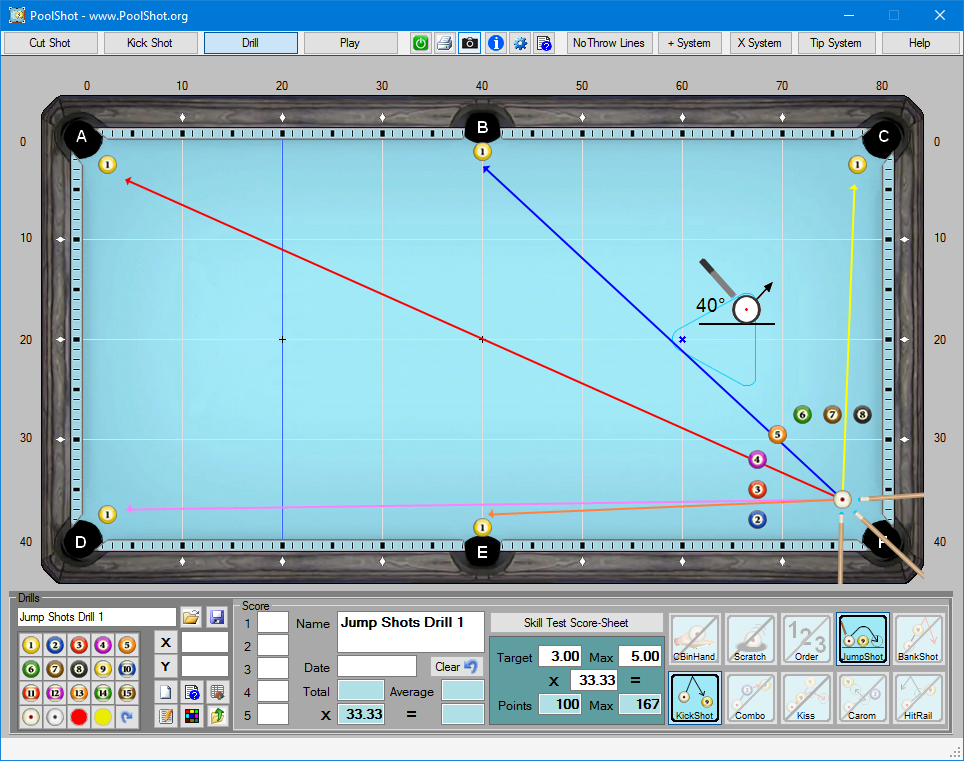
26 - Jump Shots Drill 1
|
|
27 - Kickshots with Cue Stick over Object Ball 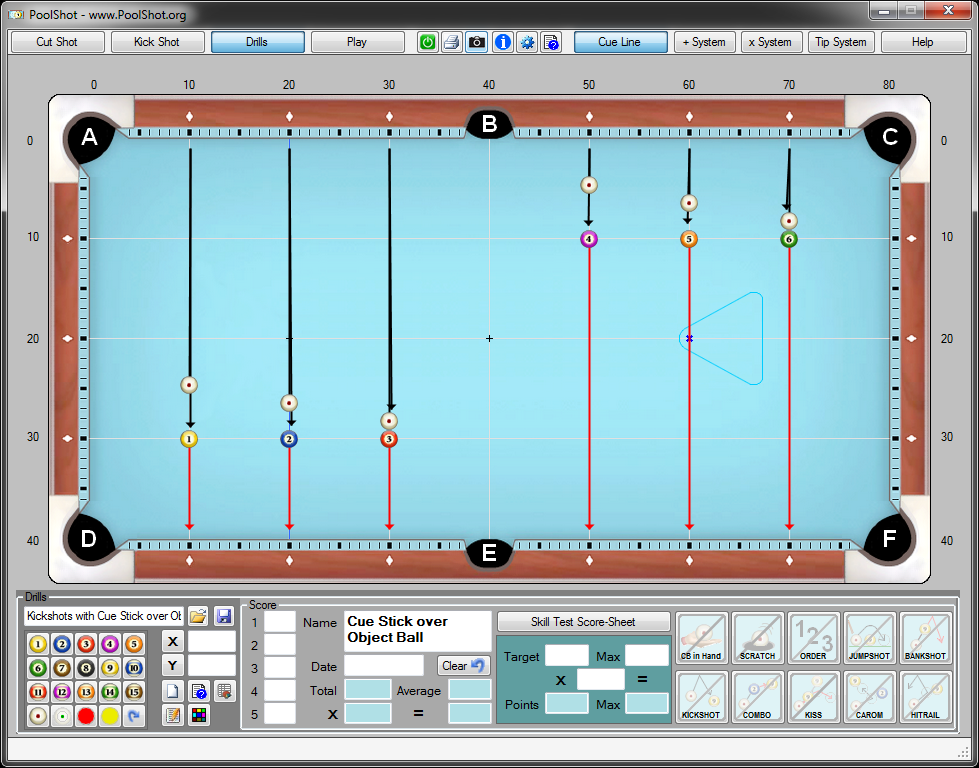
|
|
28 - Drill 1-9 Three Ways 
|
|
29 - Tricky 3 Rails Kick Shots 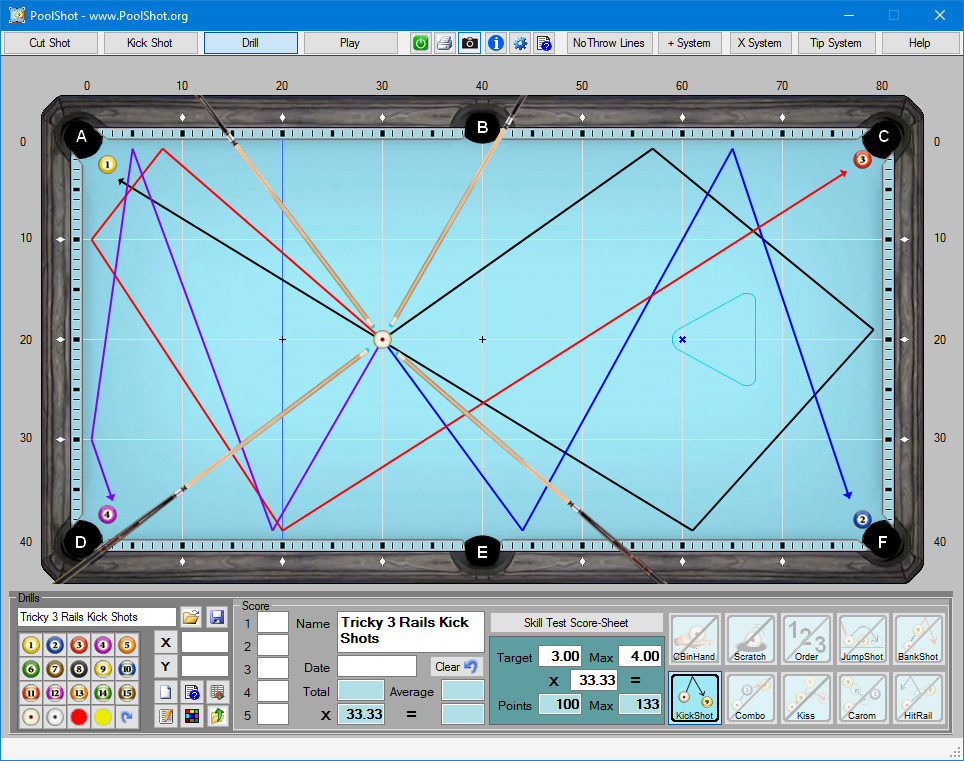
|
|
30 - Tricky 4 Rails Kick Shots 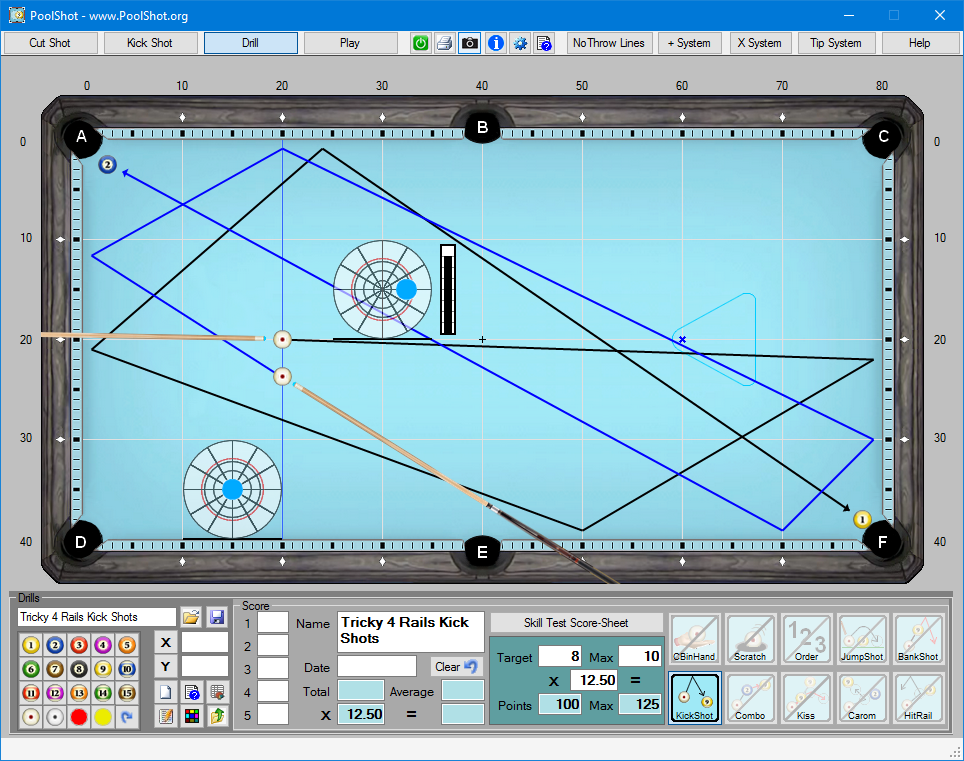
|
|
31 - Straight Line for 2 Balls 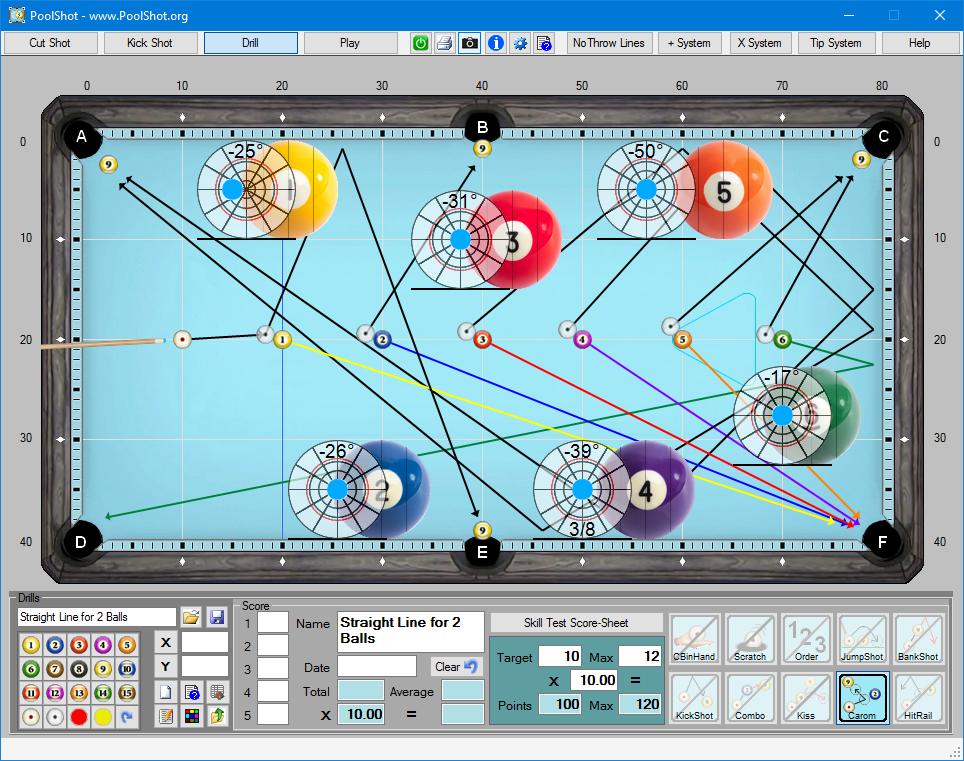
|
|
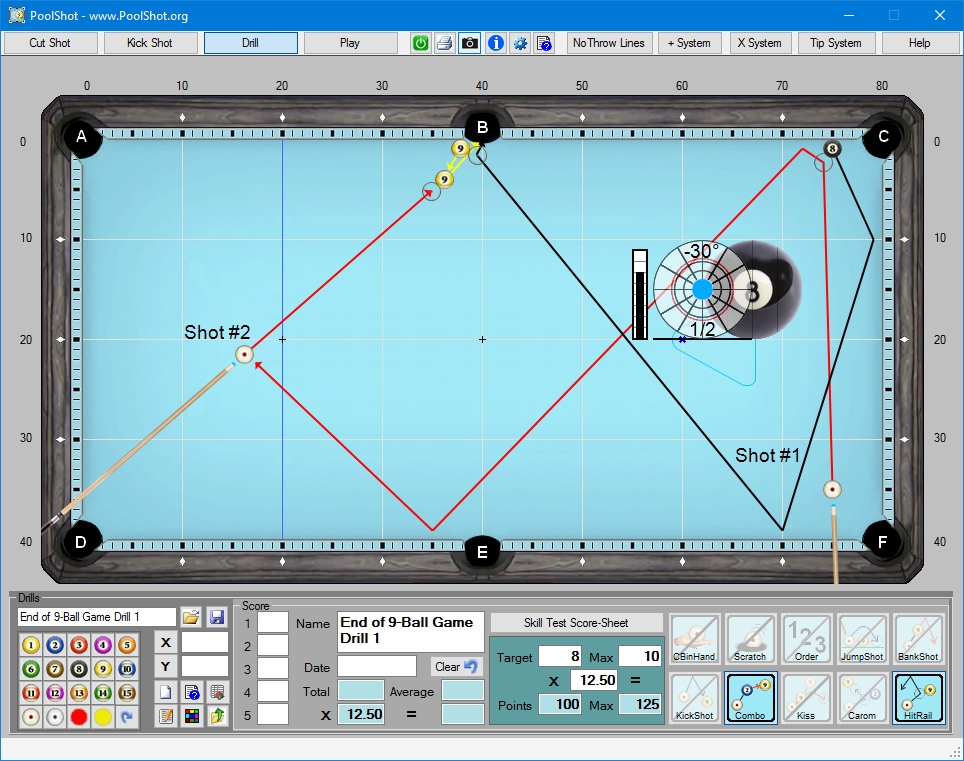
32 - End of 9-Ball Game Drill 1
|
|
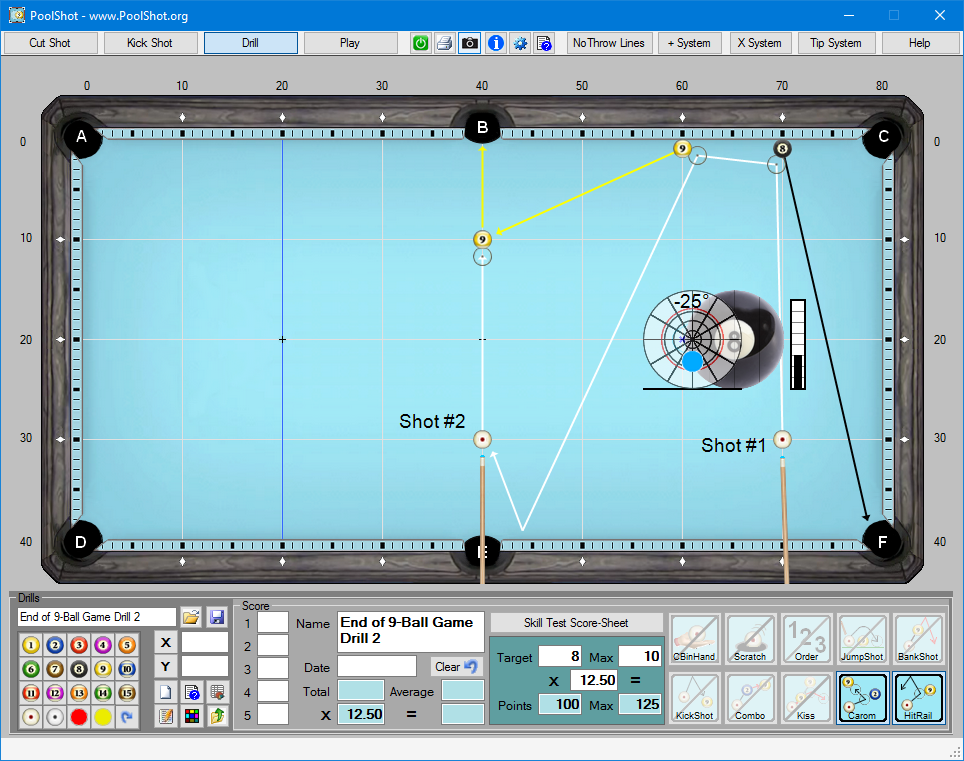
33 - End of 9-Ball Game Drill 2
|
|
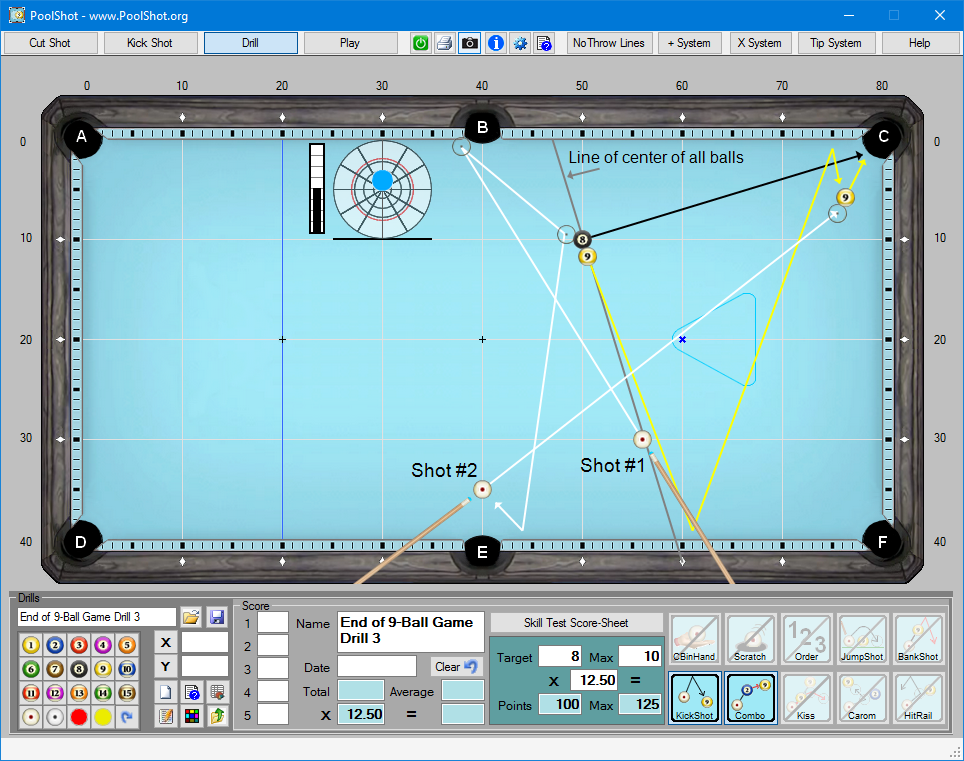
34 - End of 9-Ball Game Drill 3
|
|
Please report any bug and send your comments, questions and suggestions to admin@poolshot.org |
| Back to Home page |